A useful setup for webflow site owners begins with the information visitors need and the handoff the team can reliably cover.
Add website chat to Webflow: setup in practice
Test the add website chat to webflow experience
An agency can use the chat on service pages while keeping a private client portal outside the public support flow.
Source and next step for add website chat to webflow
The add website chat to webflow workflow should cite approved information and identify who can confirm an open detail.
Add website chat to Webflow launch owner
Your chosen reply channel
A named teammate owns the add website chat to webflow install and reply path.
Check Slack beta access before routing add website chat to webflow requests there.
Installation steps
- 1
Check plan access
Confirm the site has an active Site plan or a paid Workspace plan (Core, Growth, Agency, or Freelancer); custom code is locked on the free Starter plan.
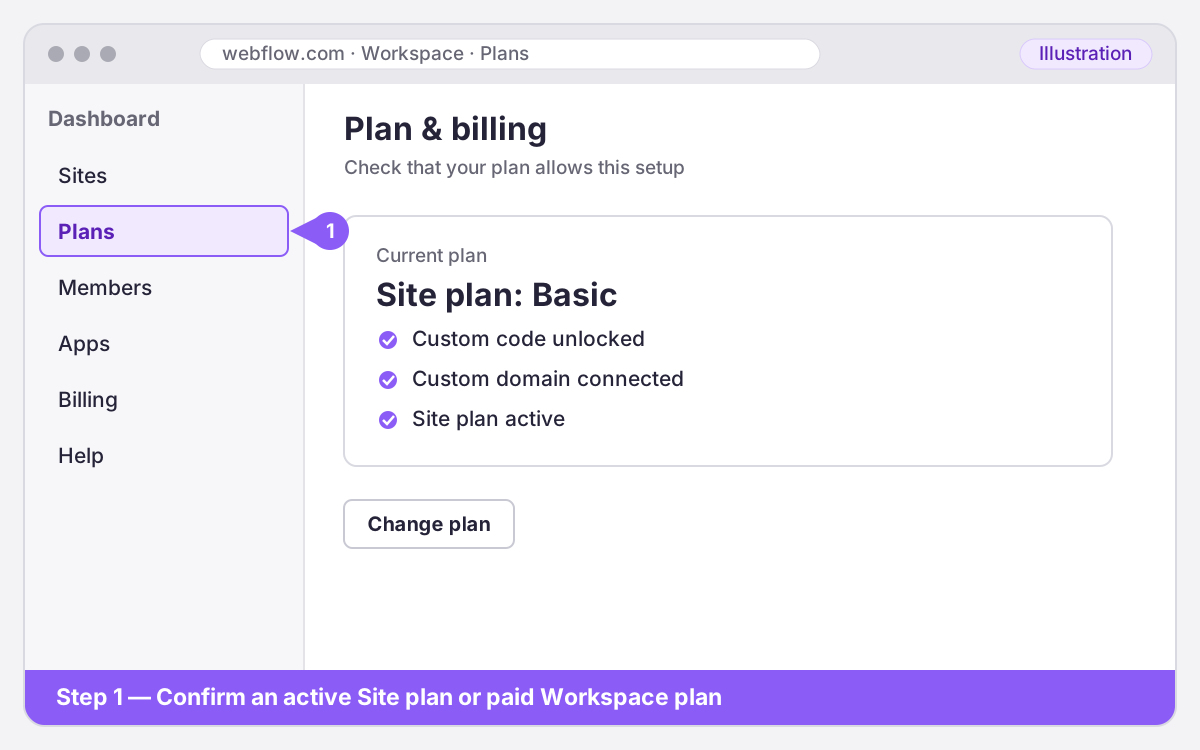
Illustration — your screen may look slightly different. - 2
Add Footer code
From the dashboard, open the site's ⋯ / Settings, then choose the Custom code tab.
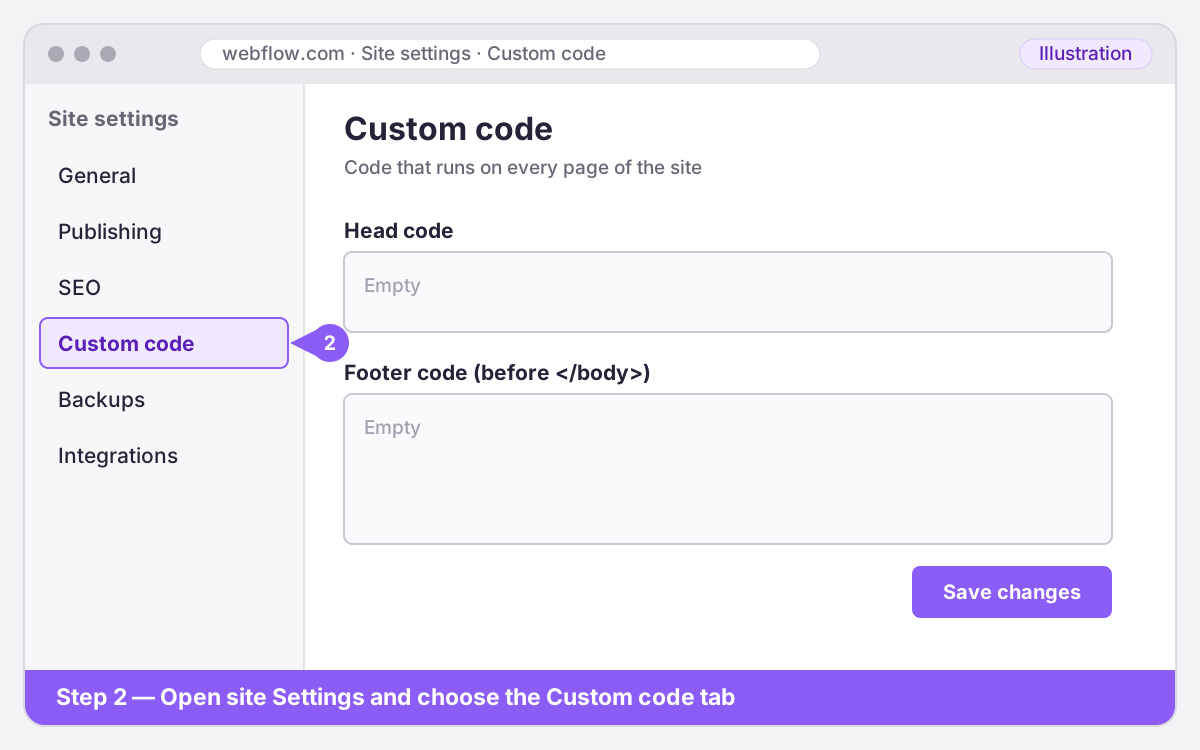
Illustration — your screen may look slightly different. - 3
Publish and test
Paste the snippet into Footer code, before `</body>`, then choose Save changes.
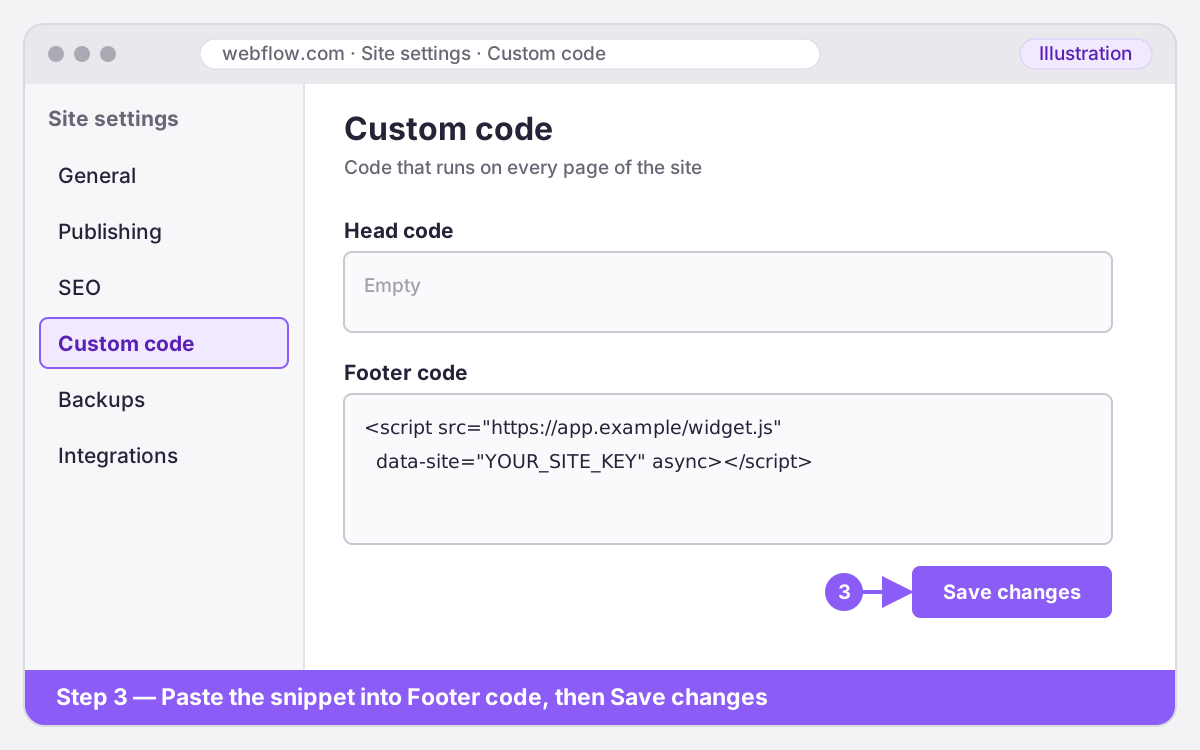
Illustration — your screen may look slightly different. - 4
Step 4
Publish the site to both the `*.webflow.io` staging domain and the custom domain you use. Add both domains to MivoChat's allowed websites.
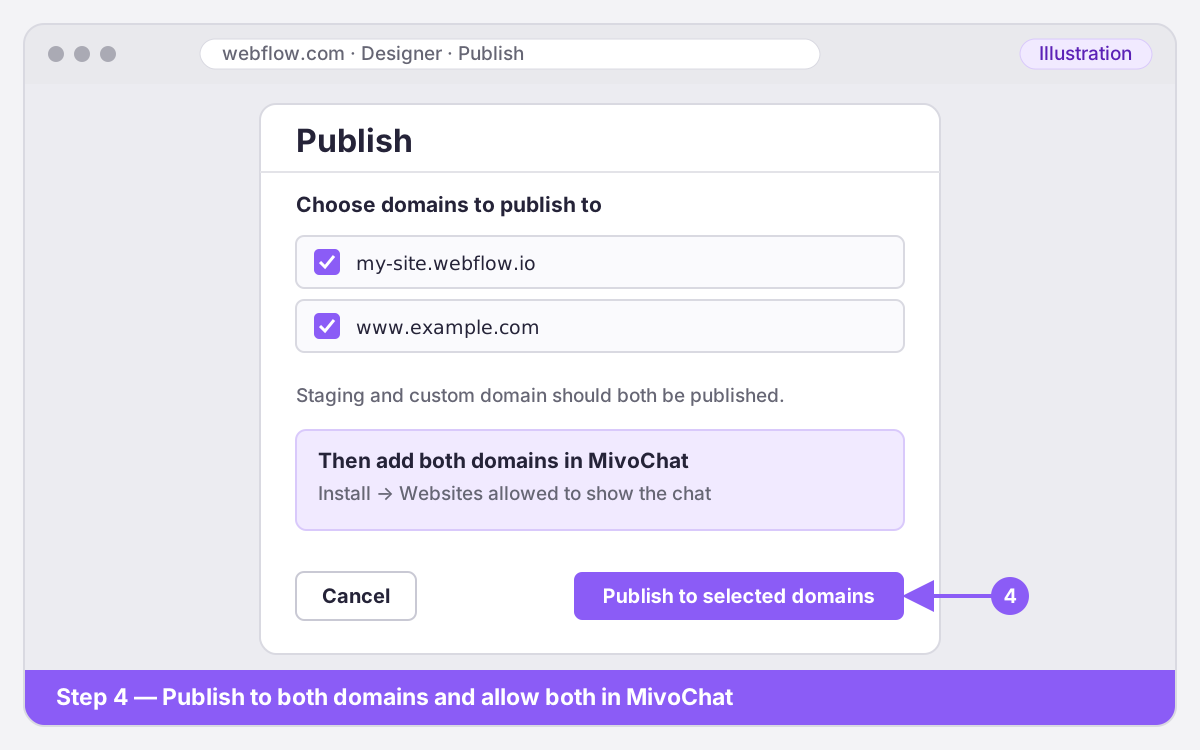
Illustration — your screen may look slightly different. - 5
Step 5
Test on a published domain, not in the Designer canvas. Do not use a Webflow Embed element; it runs inside a separate iframe.
Before you start on Webflow
Custom code requires an active Site plan or a paid Workspace plan, and it runs on published sites rather than in the Designer canvas.
In Webflow, confirm custom code is available on the plan and list the staging and custom domains you intend to publish.
- You have access to the correct Webflow site and can publish it.
- You copied the actual snippet from the matching MivoChat site.
- The production domain is allowed in the MivoChat website settings.
- You can check the published site in a private browser window after publishing.
Step-by-step Webflow setup
Save the footer code in site settings, publish both required domains, and test the live Webflow site.
- Confirm the site has an active Site plan or a paid Workspace plan (Core, Growth, Agency, or Freelancer); custom code is locked on the free Starter plan.
- From the dashboard, open the site's ⋯ / Settings, then choose the Custom code tab.
- Paste the snippet into Footer code, before `</body>`, then choose Save changes.
- Publish the site to both the `*.webflow.io` staging domain and the custom domain you use. Add both domains to MivoChat's allowed websites.
- Test on a published domain, not in the Designer canvas. Do not use a Webflow Embed element; it runs inside a separate iframe.
Domains and content security policy for Webflow
Allow the `*.webflow.io` staging domain and your custom domain.
Test on your published Webflow site
Use a published Webflow domain for the check because the Designer canvas embeds the site in a separate frame.
Troubleshooting Webflow installation
If the Webflow launcher is absent, check that footer code was saved in site settings, then republish the staging and custom domains.
Frequently asked questions
Does MivoChat install automatically on every platform?
For Webflow, use the installation path described above and check the platform’s current settings if labels change.
Can MivoChat confirm bookings or availability?
For webflow site owners, MivoChat can show an external booking link or collect a request, but it does not sync calendars or confirm availability; staff must review the request.
How do I know the installation worked?
On Webflow, test the published site from a private browser window. Check the launcher, send a visitor message, confirm it reaches the chosen team inbox, and reply to verify both directions.