A useful setup for wordpress site owners begins with the information visitors need and the handoff the team can reliably cover.
Install website chat on WordPress: setup in practice
Test the install website chat on wordpress experience
A dental practice can answer whether it accepts new patients using the exact wording from its patient page.
Source and next step for install website chat on wordpress
The install website chat on wordpress workflow should cite approved information and identify who can confirm an open detail.
Install website chat on WordPress launch owner
Your chosen reply channel
A named teammate owns the install website chat on wordpress install and reply path.
Check Slack beta access before routing install website chat on wordpress requests there.
Installation steps
- 1
Upload the plugin
On WordPress.com, confirm your site uses the Business/Creator plugin-enabled plan. Self-hosted WordPress sites need permission to install plugins.
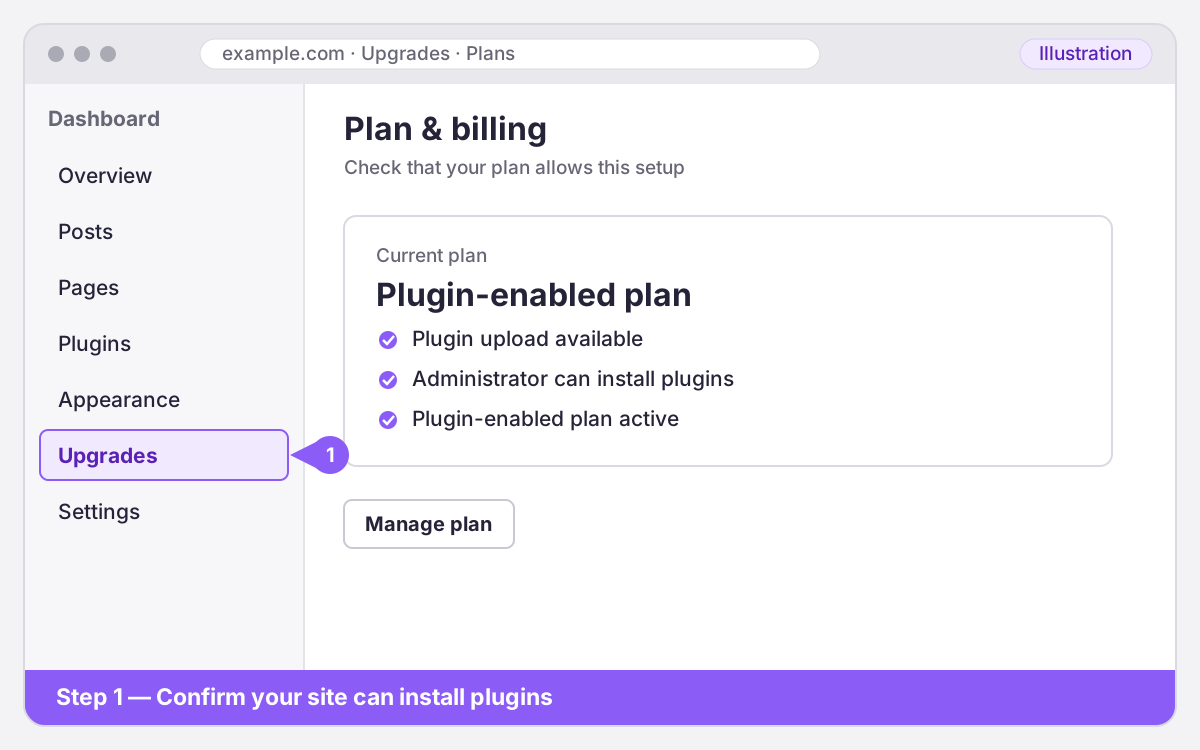
Illustration — your screen may look slightly different. - 2
Connect your site
Download the plugin ZIP from your MivoChat Install page (WordPress tab). In WordPress, open Plugins → Add New Plugin → Upload Plugin → Choose File → Install Now → Activate Plugin.
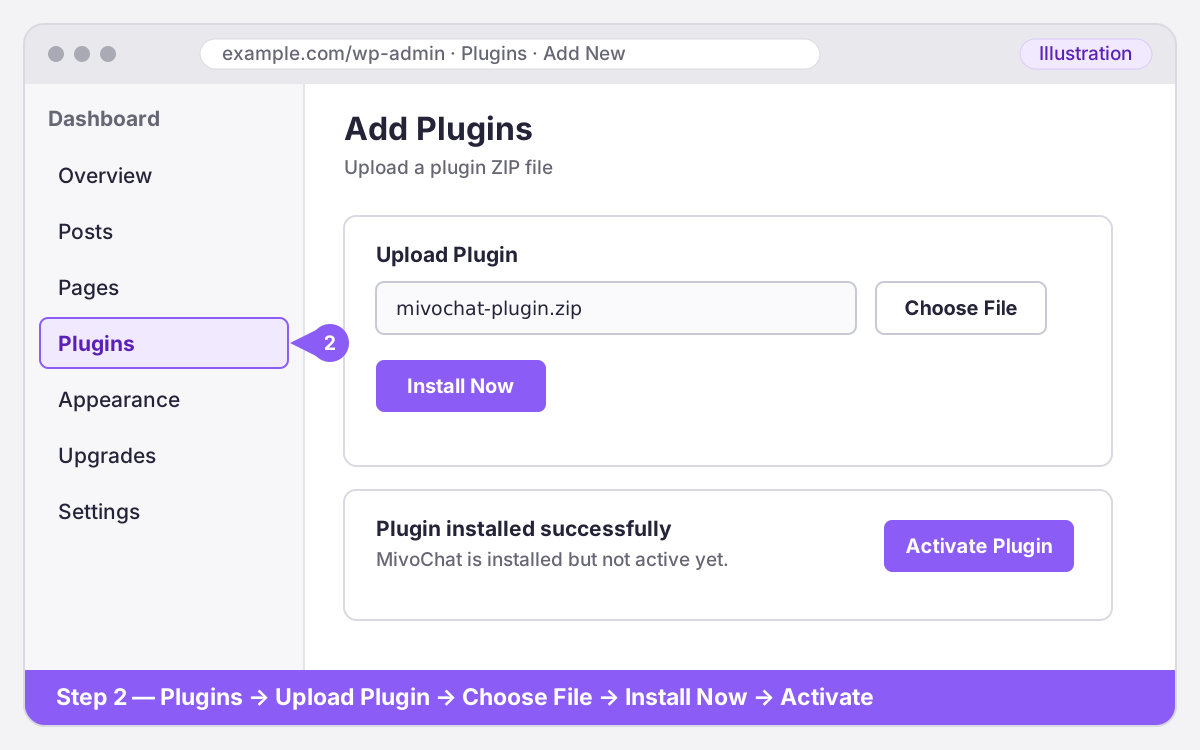
Illustration — your screen may look slightly different. - 3
Test the live site
Open Settings → MivoChat, choose Connect to MivoChat, sign in, and select the site that matches this domain.
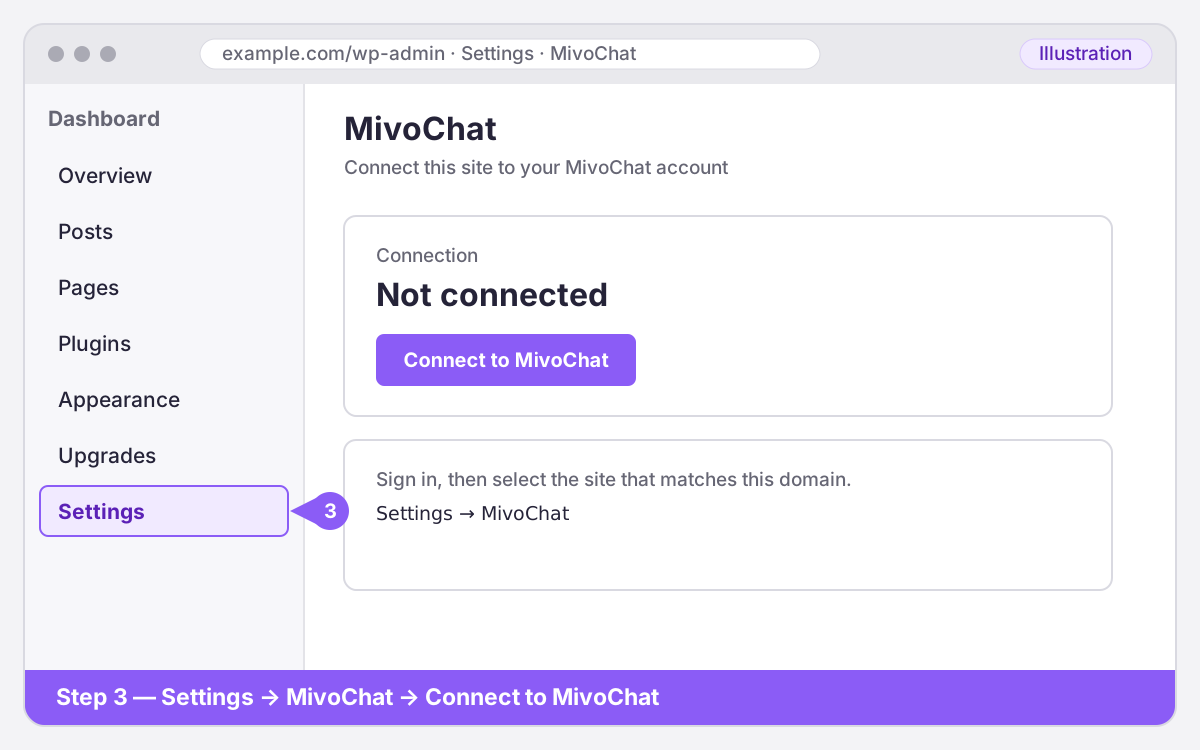
Illustration — your screen may look slightly different. - 4
Step 4
Return to the plugin and confirm it shows the connected site. Add the published domain to MivoChat's allowed websites.
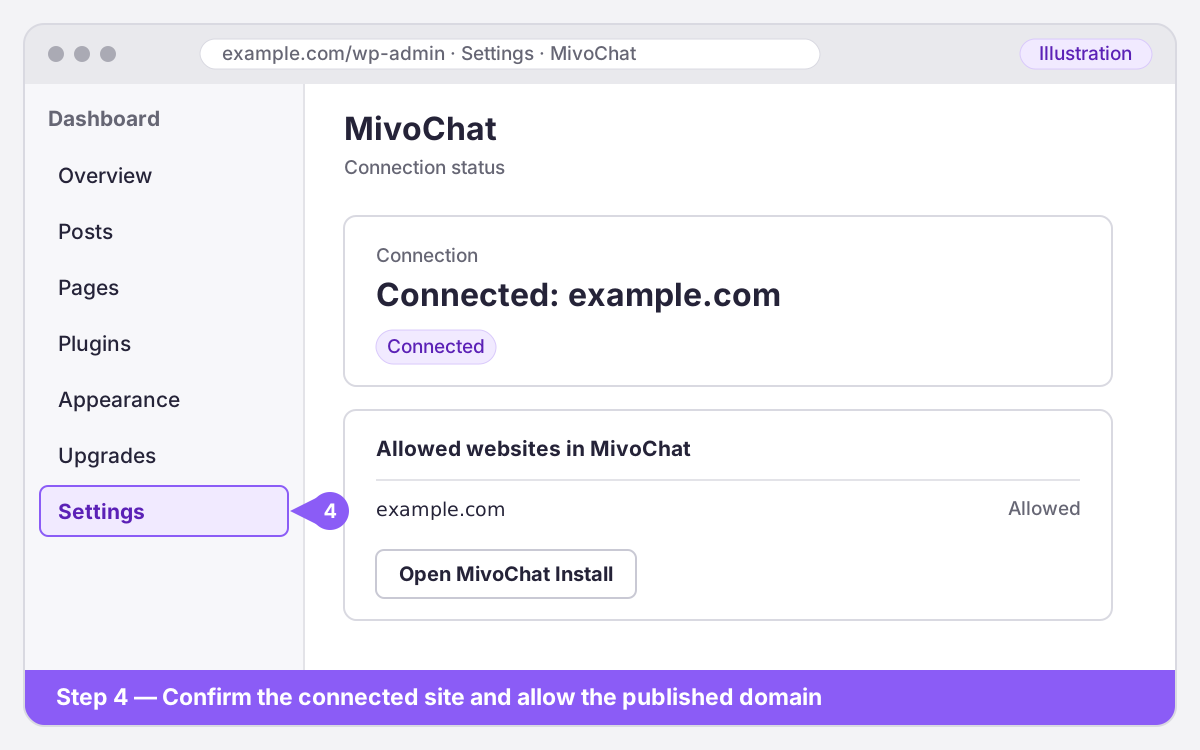
Illustration — your screen may look slightly different. - 5
Step 5
Open a published page in a private window and test a full conversation. If an optimization plugin delays or combines JavaScript, exclude `widget.js`.
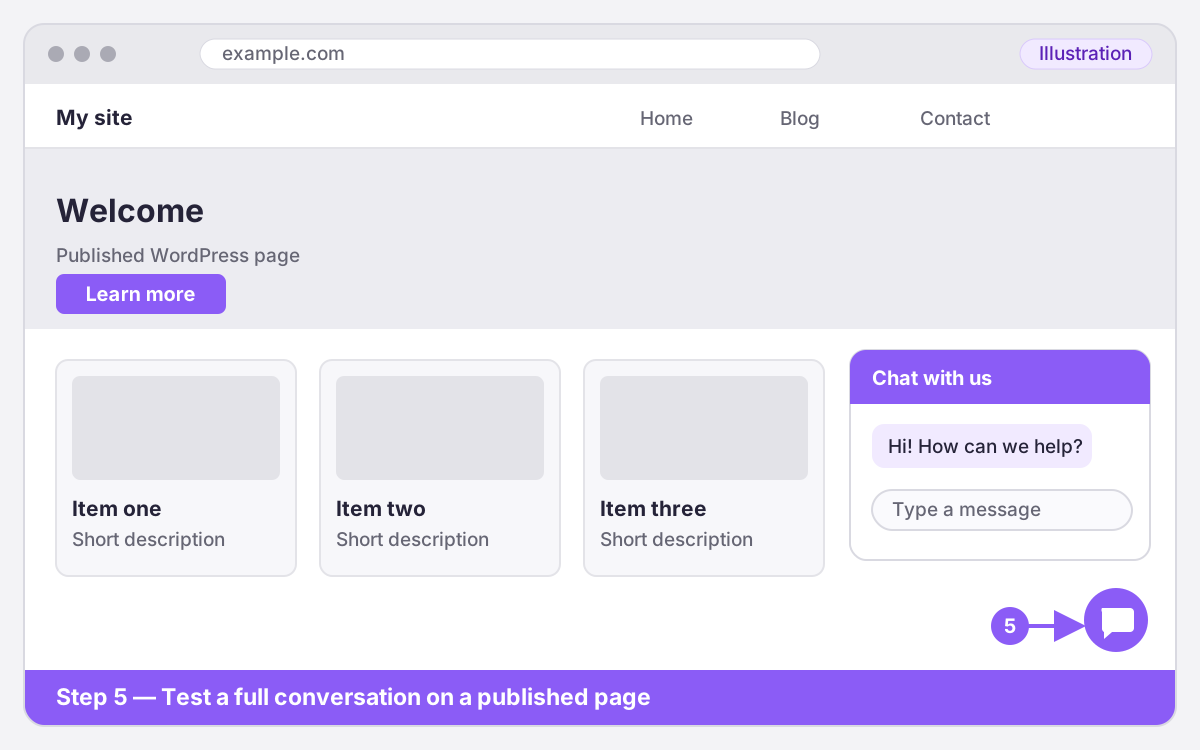
Illustration — your screen may look slightly different.
Before you start on WordPress
The plugin adds MivoChat through WordPress's footer enqueue. On WordPress.com, plugin upload requires a plugin-enabled Business/Creator plan.
In WordPress, check that you can upload plugins and identify the production site to connect before installing the MivoChat extension.
- The published website is reachable and you can sign in to its WordPress dashboard.
- You can install a plugin or ask the person who manages your site to install it.
- You have access to the MivoChat workspace and know which site should be connected.
- Your public service, price, hours, and contact pages are current before they become answer sources.
Step-by-step WordPress setup
Upload and connect the plugin before checking that the widget appears on a public WordPress page.
- On WordPress.com, confirm your site uses the Business/Creator plugin-enabled plan. Self-hosted WordPress sites need permission to install plugins.
- Download the plugin ZIP from your MivoChat Install page (WordPress tab). In WordPress, open Plugins → Add New Plugin → Upload Plugin → Choose File → Install Now → Activate Plugin.
- Open Settings → MivoChat, choose Connect to MivoChat, sign in, and select the site that matches this domain.
- Return to the plugin and confirm it shows the connected site. Add the published domain to MivoChat's allowed websites.
- Open a published page in a private window and test a full conversation. If an optimization plugin delays or combines JavaScript, exclude `widget.js`.
Domains and content security policy for WordPress
Add the connected WordPress site's published domain to MivoChat's allowed websites.
Test on your published WordPress site
Verify the plugin on a public WordPress page after activation; dashboard and preview frames do not represent visitor traffic.
Troubleshooting WordPress installation
If WordPress does not show the launcher, verify the plugin is active on the production site and exclude `widget.js` from optimization settings that delay or combine it.
Frequently asked questions
Does MivoChat install automatically on every platform?
For WordPress, use the installation path described above and check the platform’s current settings if labels change.
Can MivoChat confirm bookings or availability?
For wordpress site owners, MivoChat can show an external booking link or collect a request, but it does not sync calendars or confirm availability; staff must review the request.
How do I know the installation worked?
On WordPress, test the published site from a private browser window. Check the launcher, send a visitor message, confirm it reaches the chosen team inbox, and reply to verify both directions.